Friday, September 12, 2014

Time for Egyptian Cooking!

Hello everyone,


Lately I've been having a love affair with Egypt (especially Ancient Egypt). I believe this all began back in the fifth grade or so when my mom got me some books on mummies (Mummies Made In Egypt, sweet mother of meat, it's totally in a Reading Rainbow episode!!!) and the discovery of King Tut's Tomb. The book is Into The Mummy's Tomb.

I actually made a movie about it, Howard Carter and Lord Carnarvon discovering King Tutankhamun's tomb, not kidding, in the seventh grade(?), starring local kids (who actually wanted to be in a movie I made). I wrote a script and everything. And my teacher picked it to go on to some competition at Weber State, anyway, long story. (I still have the 8mm tape of the movie I made. I need to get it onto YouTube, haha! Or at least on a DVD. Wow, did you guys know about this? I just learned this! Wal-mart will transfer your old 8mm or VHS home movies to DVD, or slides, etc.)

Who knows, maybe I picked the books out myself at the bookstore. She (my mom) is cool and let us buy books. She let my oldest sister buy an expensive textbook on Emergency Medicine! when she was just a wee little thing. The book cost a lot of money and it wasn't exactly what my mom had in mind, and money was tight. But she let my sister buy it, and long story short, my sister is a doctor now, doing family practice medicine. (She almost did emergency medicine.)

It made me want to be an Egyptologist for awhile, until I wanted to be a marine biologist (7th-9th?) (SeaQuest?), and then moved on to an astrophysicist (10th-12th and beyond...). (Stephen Hawking was getting big and I bought and read A Brief History of Time in high school.) Kids are young and impressionable.

I got to feed my Egyptologist addiction again when I got to BYU and in my penultimate year, was trying to fulfill my Ancient Near Eastern Studies minor (basically Biblical Archaeology), realized that a class in hieroglyphs was offered. (A 500 level class, not in my chosen field of study.) I bit the bullet and took it. It was taught by Prof. John Gee. He was kind of intrigued that a physics major was taking his class. It was super hard. I didn't realize this, but there are a lot of (pornographic?) Egyptian hieroglyphics, and, while using my dictionary, I translated the weirdest piece of crap ever, didn't know what to do, wrote an apology at the bottom, and turned it in for credit. I hope he laughed his head off. (Aside from being weirded out.) Things improved as I was too stubborn and determined to drop the class.

I got to learn about Sinuhe and The Shipwrecked Sailor! I wrote a giant report on the Middle Kingdom! I got to read, transliterate, and translate hieroglyphics! And the class was only a semester long, although he taught us what they take a full year to learn at Harvard. Or Cambridge? Or University of Chicago? Or whatever university it was he used in his example?

He actually took pity on me and told us basically what would be on the final. It was us translating an excerpt from The Shipwrecked Sailor. You bet I locked myself in the Lee library and did nothing but translate that thing for eight hours straight and tried to pound it into my head. I think I had a D in the class on homework assignments and translating, but mysteriously pulled myself up to a B after the final. I think he took pity on me with that test score, too. I bet I deserved worse. Oh well, I would have been happy with a C or D because I was TAKING EGYPTIAN HIEROGLYPHICS and it was SO AWESOME! Even if I stunk at it. (Then again, when you are comparing yourself to the grad students taking the course, who have had about 4 years experience already, some had previously taken the class, and were also familiar with Assyrian cuniform, you might come up wanting.

So derailed...

FOOD!....

Let's talk about food!

I listen to YouTube videos to help me sleep. It used to be episode of Red Eye with Greg Gutfeld, but then my favorite source (Content Dump, love you) but no new videos went up for awhile and I had listened to the old ones too many times. I started listening to videos about Ancient Egypt and old archaeology sites, and then moved on to Egyptian music (the meditative stuff that goes for an hour is pretty good), and then thought, what the heck, I should start cooking Egyptian food. I am also planning on being Cleopatra (or just some Egyptian lady) for Halloween this year. I've got it BAD.

Here is a great video with flavor profiles and traditional dishes from Egypt. I am so going to start cooking food like this for Adam. (But really, it's more for me.) My Moroccan Chicken Tagine has a similar profile, with the cinnamon and what not, and they even use tagine ovens in Egypt, although they call them something else, tagin or something.

Egyptian Cuisine YouTube Video 1 of 3.

Egyptian Cuisine YouTube Video 2 of 3. (Dang, there is a problem with this video now. Bogus.

Egyptian Cuisine YouTube Video 3 of 3.

It all came from a book. I got hooked on the Amelia Peabody series by *Elizabeth Peters (*not her actual name), who is a lover and actually a scholar of Ancient Egypt. What a fascinating lady, both the author and the main character. I'm having a lot of fun. And the books are so well researched, by an actual Egyptologist. Freaking amazing.

Friday, July 11, 2014

Pizza, Italian (or New York) Style!

Mmm, crusty thin crust. Bubbly, toasty cheese. Classic Margherita flavors on a thin, chewy crust.


Supreme pizza toppings on the freshest, tastiest piece of pizza imaginable.


I wanted to make this. I found what I thought was a good recipe. (More about this later in the process.) The website sat and sat in an open browser on my phone for at least a month. It's hard to make pizza when you've got a four-year-old and four-month-old running your life. It was hard to plan ahead enough to make dough so the dough would be ready when it came time to start cooking at night. Anyway, here's the story. Bad things happened along the way and I thought it would be a disaster, or mediocre at best, but it turned out AMAZING! The best pizza I've ever made. There are some tricks you should know and I'd like to share them with you.

I started making the dough today from this recipe. It looked good. The recipe is from Serendipity Mommy and it's called The Only Pizza Dough Recipe You'll Ever Need.

I only held off on eating it to take photos because I knew the sauce was still so hot, it would burn my mouth off. But get in my BELLY!


I like that the dough included garlic powder, olive oil, and Italian herbs. I don't even know where I found the link. It wasn't through the usual internet search engine like Google. My only beef with the recipe is that I needed to add a lot more flour than what it called for. And that started freaking me out. I also used old bread flour that was past expiration, so maybe that was why the gluten wasn't activating? I don't know. I read up on it and since the flour smelled okay, not like rancid oils, it should have been fine.

I also have a beef with the serving size. Twelve? More like two-and-a-half. The pizzas are no more, and there are only three of us, and one is pint-sized. (To be fair, Adeline really liked it and had a pretty big serving size.)

Things you'll want to do in order to go the extra mile to get that really great, fresh pizza:

-Thin crust, baby. (Choose thin over thick, especially for the Margherita.)
-Use the freshest ingredients you can find. Fresh tomatoes over canned tomatoes for sure! Fresh basil if you've got it. Fresh onion, fresh green pepper, canned olives okay, though.
-Use a pizza stone and preheat it for awhile to fully warm it.
-Let gravity pull the crust, don't roll it with a rolling pin. Use your fingers, and be patient and give it time and more flour to keep it a big circle. Ya know how it's annoying when it snaps back to being small and then you're just eating a tiny, thick pizza? Overcome this. And when it's almost the size you want, use corn meal on the bottom.
-Don't let the pizza dough tear. (If it does, use a little water to get it to stick back together, and then be more careful.) When the dough is getting really thin, put it on the pizza peel (paddle thingy) (or cookie sheet with no edges) for easy transfer to the pizza stone. Use the palms of your hands and finger tips to stretch it a little more on the peel. Make sure flour and/or corn meal is on the bottom so the pizza dough won't stick and it will be easy to transfer to the pizza stone.
-There's a trick to getting the pizza off the peel and onto the stone. This is one of the hardest parts of the pizza process if you don't have a good system. My system is to keep the bottom from sticking to the peel by having enough corn meal and flour under there. Position the peel just above the heated pizza stone in the oven. Gently pick up an edge of the rolled out pizza dough. Slightly tilt the peel and put the edge on the stone. Let the rest of the pizza slide off the peel and it does the job. The worst is when your pizza does an accordion and smashes together on the stone. I hope this doesn't happen to you. Be careful and patient, but not too timid, and you should have some good results.
-Cook the dough all by itself on the stone first for about ten minutes (or until just getting a little golden) and then pull it out, add the toppings, and finish cooking the pizza on the stone. The dough won't get soggy from the sauce and toppings and it will be chewy and wonderful.
-When making Margherita, add a tiny bit of pizza sauce (I cheated and used Whole Foods bottled spaghetti sauce with garlic) and smear it around, then add thinly sliced tomatoes all over (as if they were the sauce), then mozzarella in thin rectangular/almost squarish slices, not too much. let a lot of tomato peek through, then a little basil, also not too much. I don't like the tomatoes on top of the mozzarella. Who does that? There is something sick and wrong about that. Maybe I'm getting more "Italian" and I realize that you shouldn't mess with perfection. (Aka the way it's classically done in the recipe. Don't be creative here, stick with tradition.)

She can't take her eyes off of that good-looking Margherita pizza we made together.


-When making Supreme, add a bit of pizza sauce, but DO NOT OVERDO the sauce. A little goes a long way. This used to be my problem. I would add too much of everything on pizza, especially sauce, and then it was too weighed down and soggy and just mediocre. Shoot for AMAZING! And do not be heavy-handed with toppings.
-Layer the Supreme this way, you'll be glad you did: Sauce on bottom, then any combo of diced onion, sliced green pepper, red pepper, mushrooms (I did large portabella caps diced up, yum!), sliced black olives. Do NOT overload. Then finish with mozzarella cheese on top. And if you're doing pepperoni, the pepperoni goes on the very top, resting on the cheese. This way both the cheese and the pepperoni can get a nice golden toasty look and taste. So so good! Sorry we are getting so nitty-gritty, but believe me, it's important.
-If you're doing a deep dish Chicago style, then you can add tons of sauce and toppings. But you will need to find another recipe for the proper crust. Share it with me if you do, I want to successfully make a good deep dish pizza, like the kind you can get at Pi Pizzeria in St Louis. So so good.

Just some things you'll want handy as you make the dough and pizza. Cornmeal, sauce, pizza slicer. Someday I'll get one of those fancy rocking pizza knives to cut it without pulling the toppings off.


You might want to accessorize your pizza with sparkling grape juice or a salad. I failed and bought flat water that I thought was fizzy, but it came from Tuscany and it tastes like amazing glacier water, so I guess it's all good. (And I had a bottle of Perrier handy to go in the grape juice, and it was delicious.) I thought the labels were especially pretty.


Take me to Tuscany!


Adeline wanted to play with my camera and be a photographer, too! Here's a great photo she took of her pizza.


I'm going to re-post the recipe in case the website goes down. It contains my notes and what I did differently.

-----------------------
Perfect Pizza Dough
By Candy, the Culinary Grad at Serendipity Mommy
(Parentheses mark where Danelle deviated.)

Ingredients:

1 C. HOT water (110 degrees F or 45 degrees C)
1 pkg. active dry yeast

2 C. Bread Flour (more like 3 C., 2 C. Bread Flour, 1 C. all-purpose (I had run out of bread flour))
2. tsp. white sugar
2 tbs. olive oil
1 tsp. garlic powder (or fresh minced if you wish)
1 tsp. Italian seasoning
1. tsp. salt

Instructions:

Dissolve the yeast in the water and let it set for ten minutes, it will thicken slightly
Pour the yeast mixture in the mixer bowl
Add the flour and other ingredients leaving the salt for last, the salt will kill the yeast with direct contact so make sure its last to go in.
Beat the dough into a stiff ball.
(It NEVER made a stiff ball, I beat it FOREVER with the dough hook in my stand mixer. Gave up. Added more flour. Didn't really knead it in since my kids started having melt-downs. Figured it was going to turn out mediocre at best.)
If it sticks use a little olive oil on your hands and it will come off. (Olive oil? Let me know if that works for you. I used flour on my hands. It was still sticky, but magic things can happen during the rising phase.)
Cover and let rise to double size, which takes about 25-30 minutes. (Kind of forgot about it during the rising phase while I was nursing a baby and putting her down for a nap. It rose for maybe an hour. It looked pretty good. I touched it and it immediately deflated. Oops. I threw it in the refrigerator to deal with later when it was time to make pizza.)
This recipe made 3 personal 8 inch pizza’s but would make 2-12″ pizzas as well. (Yes, we turned it into 2-12'' pizzas.)

For Pizza: (This is where I deviated to Better Homes and Gardens Instructions for Thin Crust Pizza.)

Heat oven to 375 degrees. (Nope, 425 degrees. (Authentic pizza ovens operate well over 500 degrees, so don't panic. Experiment!) Also, get your pizza stone in there nice and early. Give it a good half hour to heat up to 425 degrees.)

Roll your dough into a round shape with a rolling pin on floured surface if desired OR shape the dough in your hands just working in a circle letting the dough gently stretch. (Just use your fingers and palms and gravity to stretch the dough. You know you've done a good job when it doesn't pull back to being small. Use flour as needed to keep it stretched out and nice and thin. Put it on a peel with flour and corn meal underneath to keep it from sticking, and get ready to cook it without toppings on the pizza stone.)

Place on your pan, make sure you leave some extra at the edges if you want a thick crust there, then add your toppings, Bake for 15-20 minutes. (Just look to the Better Homes and Gardens Pizza and Thin Crust tips for baking instructions. Cook it until the cheese is bubbling and turning a lovely golden color and the crust looks nice and crisp.)
-----------------------

My wonderful sous chef.


In the photo above, she's pictured with the Margherita. Below is the Supreme.


Adeline helped a lot. She was so excited to mix the yeast into the hot water. Adam lets her help him make his famous Sourdough Pancakes (I should include a link for the recipe for that here! - will do soon!) and she loves helping get the yeast going the night before with Daddy. She's getting a lot of hands-on experience with yeast already!

Here she is with the finished Margherita and our make-shift peel with dough ready for cooking. (Don't forget that you add the toppings in the middle of cooking. I know it's a lot of steps, but if you try it a few times, it gets easier and you can do it more quickly.)


Here are the Better Homes and Gardens tips on pizza and thin crust, if needed. You can also just Google it and find it that way.


My stand mixer really needs the grease replaced. I'm pretty sure the grease split and ran out the back. Sometimes some of us forget to put the gear head back down from being tilted and the grease leaked out the back. I didn't realize that's what the nasty oily gunk coming out the back was until a few years later. There are great YouTube videos that will help me with this fix. This seems like a tangent, but since I would need the stand mixer to help make the dough, I didn't want the gears to grind and die while I'm trying to make this, so it's one reason I have been putting off making this recipe. I wanted to service the stand mixer first. I need to find some time to address adding more grease to the gear box. I have never done this before and it's freaking me out. I just ordered the stand mixer grease today from Amazon, along with some Italian 00 flour for making super pizza dough! And a pizza peel, our other one went kaput. We are not operating on full cylinders here. None of these things will arrive in time for me to make the pizza tonight. I am looking forward to making a lot more pizza. It's been awhile. And I actually thought that the cookie sheet worked very well as a peel. Maybe I shouldn't have ordered one. Darn.

I'm in pizza heaven. Best and freshest supreme I've ever had. We all love pepperoni around here.


Friday, September 20, 2013

Two Chefs That Have Recently Intrigued Me

Their names are Heston Blumenthal and Rene Redzepi.

Heston Blumenthal has brought a sense of childlike wonder and some scientific magic to his cooking, elevating it and making himself a big name in the United Kingdom and abroad. His Michelin three-star rated restaurant, the Fat Duck, is one of four honored restaurants in the UK. His restaurant is not far from London. If money were no object, I would like to go someday.

I would also like to read all the books he has written. He seems happy to share what he's learned, and he even has a podcast. What a homie. And I do love my English breakfast.

Heston Blumenthal's Golden Ticket Ride on the Breakfast Express.
video one.
video two.

I just heard about Rene Redzepi tonight. Actually, a foodie was tearing him apart in his blog and said that his food is overrated, but it got me interested. Redzepi is supposed to have reinvented and elevated Scandinavian cooking. I was looking into my family history a few years ago and was specifically interested in "how American" I was or what part of my genetic makeup was from where. About 1/16 of me is from the Boston area from the 1600s, but mostly it was United Kingdom immigrants between 1850-1890. Or so I thought. About 1/4 of my dad's side comes from Sweden (with a small sprinkling of Danish) and about 1/4 of my mom's side comes from Denmark. I checked it out and those Danes in my family tree hail from the opposite side of where a lot of Adam's family comes from. But it makes me laugh that I am about 1/4 Scandinavian. (I *do* love to claim those Scottish roots, my mom's maiden name is McRae, but statistically speaking, I am not that Scottish (sadly).)


Anyway, I wanted to see what recipes Rene Redzepi had and to start making them and do a little Scandinavian cooking. Sounds like FUN! Sounds like...

A COOKING ADVENTURE!!!

Two of his recipes are listed below.

Redzepi’s Rules

1. “Think of the meat as a condiment: A vegetable broth with a few drops of chicken stock or some bacon added to a dish can do wonders.”

2. “Like when you’re beginning an exercise routine, you can’t just say one day, ‘Okay, I’m going to cook predominantly vegetables.’ It takes effort and it hurts. But soon it becomes something that you need.”

3. “This is like eating maize or tapas. Make a variety of boiled, steamed, and roasted things with a few cool condiments. The meal gets prolonged, and the conversations get longer as well.”

4. “Have a well-stocked pantry with items that work with whatever you find at the market: a homemade pesto, good anchovies, miso, soy, preserved lemons.”

5. “This is how I started to make vegetables at home. Put a pot of boiling water on, plop some vegetable in it, and lift it out when it’s perfectly cooked. Then add a fistful of any herb you’re in love with, some oil or butter, and taste it. Let this be your guide: How does it taste? What else can I do with it?”


Sourdough Toasts With Mushrooms and Oysters
Rene Redzepi, via Bon Appetit blog.

INGREDIENTS
8 tablespoons (1 stick) unsalted butter, divided
6 1/2-inch-thick diagonal slices sourdough baguette, or 3 slices sourdough country loaf, halved
2 tablespoons extra-virgin olive oil
1 1/2 pounds small mushrooms (such as chanterelles, morels, crimini, or button mushrooms), brushed clean (halved if large)
Kosher salt
1/3 cup heavy cream
12 fresh oysters, shucked, chopped, drained (optional)
2 small shallots, minced
1 tablespoon finely chopped flat-leaf parsley
12 very thin slices lardo (optional)

PREPARATION

Melt 2 Tbsp. butter in a large heavy skillet over medium heat. Add 3 bread slices and toast until golden and crisp, about 3 minutes. Add 1 Tbsp. butter to skillet; turn bread and toast until golden and crisp, about 3 minutes longer. Transfer toasts to a wire rack; let cool. Repeat with remaining 3 bread slices and 3 Tbsp. butter. DO AHEAD: Can be made 1 hour ahead. Let stand at room temperature.
Wipe skillet clean. Heat oil in skillet over medium-high heat. Add mushrooms and sauté, tossing frequently, until lightly colored but still firm, about 2 minutes. Season with salt and transfer one third of mushrooms to a plate. Add 2 Tbsp. butter and cream to skillet. Bring to a simmer; cook until cream is very thick and mushrooms are well coated in sauce, 3–4 minutes. Stir in oysters, if using, and shallots and parsley.
Divide toasts among plates; spoon mushroom mixture over. Top with reserved mushrooms. Lay 2 slices lardo over each toast, if using. Serve immediately.
KEYWORDS
Appetizers, Copenhagen, Mushroom Recipes, Oyster Recipes, Recipes From Rene Redzep


Walnut Cake
Found here at Bon Appetit, too.

INGREDIENTS
1 cup (2 sticks) unsalted butter, room temperature, plus more for pan
6 tablespoons raw sugar, divided
7 cups walnut halves
3/4 cup all-purpose flour
1 1/2 cups almond flour or almond meal
3/4 cup granulated sugar
6 large eggs
3/4 cup heavy cream
1/2 cup plain whole-milk yogurt
1 teaspoon kosher salt
1 vanilla bean, split lengthwise
Whipped cream

PREPARATION

Preheat oven to 350°. Butter a 13x9x2" metal or glass baking dish; sprinkle bottom evenly with 3 Tbsp. raw sugar. Set aside.

Pulse walnuts in a food processor until coarsely chopped. Set 2 cups aside. Add all-purpose flour to processor and pulse until walnuts are very finely ground, 1–2 minutes. Add almond flour; pulse to blend. Set aside.
Using an electric mixer, beat 1 cup butter and granulated sugar in a large bowl until light and fluffy, 2–3 minutes. Add eggs, cream, yogurt, and salt. Scrape in seeds from vanilla bean (reserve bean for another use). Beat until well combined, 1–2 minutes. Add ground-walnut mixture and beat just to blend. Gently fold in chopped walnuts, being careful not to overmix. Pour batter into prepared dish; smooth top. Sprinkle with remaining 3 Tbsp. raw sugar.
Bake until cooked through and a tester inserted into center comes out clean, 50–55 minutes. Let cool in pan on a wire rack. Serve with whipped cream. DO AHEAD: Can be made 3 days ahead. Cover and chill. Cake is best served cold.
KEYWORDS
Cake Recipes, Copenhagen, Dessert, Recipes From Rene Redzepi, Rene Redzepi

Autumn and Halloween Recipe Linkfest - My Recipe "To Do" List

My friends have been posting yummy looking recipes online. I usually "like" them in my Facebook feed and then forget about them, then wish I had the recipe later. But I saw a great one for Pumpkin Apple Streusel Muffins and my daughter and I LOVE making muffins together in the morning. Then we might have a little tea party brunch and eat the fresh muffins, and then save the leftovers in a ziploc baggy to freeze in the freezer and munch on later or pack as a snack on an outing. So many options for leftovers. The Caramel Spiced Pumpkin Parfaits just look amazing.


Here are some of the recipes. I hope to update and let you know how they turned out and if they are going to join my repetoire. The pumpkin apple muffin one has streusel. Everyone loves streusel on their muffins! My husband doesn't like pumpkin so more for me and my daughter.

Pumpkin Pie Spice Recipe
From Allrecipes.com. I already have a great taco seasonings recipe and a fajita seasonings recipe in my recipe book. I need to whip up some pumpkin pie spice and have it ready to go when I need it.
Recipe can be found through this link.

"Use this mixture in recipes that call for pumpkin pie spice. A blend of cinnamon, nutmeg, ginger and allspice that can be scaled to any size."
INGREDIENTS:
4 tablespoons ground cinnamon
4 teaspoons ground nutmeg
4 teaspoons ground ginger
3 teaspoons ground allspice
DIRECTIONS:
1. In a small bowl, combine all ingredients and mix well. Store in air tight container. Makes 8 tablespoons.


Pumpkin Apple Streusel Muffins
LIBBY'S PUMPKIN
By: LIBBY'S PUMPKIN
5 out of 5 34 ratings
Muffin recipe link here.

Prep: 20 mins
Cooking: 30 mins
Level:Intermediate
Cooling: 5 mins
Yields:24 muffins
Pumpkin Apple Streusel Muffins are moist and delicious with cinnamon streusel topping that makes these muffins memorable!

Ingredients

MUFFINS
2 1/2 cups all-purpose flour
2 cups granulated sugar
1 tablespoon pumpkin pie spice
1 teaspoon baking soda
1/2 teaspoon salt
1 1/4 cups LIBBY'S® 100% Pure Pumpkin
2 large eggs
1/4 cup vegetable oil
2 cups apples, peeled, cored and finely chopped
STREUSEL TOPPING
1/4 cup granulated sugar
2 tablespoons all-purpose flour
1/2 teaspoon ground cinnamon
2 tablespoons butter or magarine

Directions

PREHEAT oven to 350º F. Grease or paper-line 24 muffin cups.

FOR MUFFINS:
COMBINE flour, sugar, pumpkin pie spice, baking soda and salt in large bowl. Combine pumpkin, eggs and oil in medium bowl; mix well. Stir into flour mixture just until moistened. Stir in apples. Spoon batter into prepared muffin cups, filling three-fourths full.

FOR STREUSEL TOPPING:
COMBINE sugar, flour and cinnamon in medium bowl. Cut in butter with pastry blender or two knives until mixture is crumbly. Sprinkle over muffin batter.

BAKE for 30 to 35 minutes or until wooden pick inserted in center comes out clean. Cool in pans for 5 minutes; remove to wire racks to cool slightly.


Caramel Spiced Pumpkin Parfait
By way of Slow Roasted Italian blog.
By way of Parade Magazine blog.


By DONNA ELICK
SERVES
4
ACTIVE TIME
20 min.
TOTAL TIME
20 min.
SAVE RECIPE
PRINT
INGREDIENTS

Caramel Sauce:
1 (11-oz) bag vanilla caramels, unwrapped
½ cup heavy cream
Pumpkin Mousse:
4 oz cream cheese, softened
1 (15-oz) can pure pumpkin, (not pie filling)
1 cup heavy cream
¼ cup brown sugar, packed
2 tsp ground cinnamon
⅛ tsp ground ginger
⅛ tsp ground nutmeg
Brown Sugar Whipped Cream:
2 cups heavy cream
¼ cup brown sugar, packed
Cookie Layer:
4 graham cracker sheets
4 Tbsp unsalted butter, melted
2 tsp ground cinnamon
2 Tbsp brown sugar
DIRECTIONS

Prepare caramel sauce: Place unwrapped caramels and cream in a microwave safe bowl and heat until melted. Stop microwave and stir every 30 seconds. Once you have a smooth mixture, set aside to cool.

Prepare Mousse: Combine ingredients in a medium bowl. Beat with an electric mixer on medium until light and fluffy, about 3 minutes. Place in refrigerator while you prepare the remaining ingredients.

Prepare Whipped Cream: In a tall bowl whip cream with an electric mixer until soft peaks form. Add brown sugar and whip until stiff peaks form (when you lift mixer out of bowl, cream stands up on the end of the beater). Place in refrigerator while you prepare the next layer.

Prepare Cookie Layer: In a small bowl combine ingredients, smash graham crackers with a fork. Continue mashing until you have one cohesive mixture.

Assemble: Add a heaping tablespoon of cookie mixture to trifle dish. Add a heaping tablespoon of mousse. Add a heaping tablespoon of whipped cream. Pour 2 tablespoons of caramel sauce into dish. Repeat layers. Drizzle final caramel layer on top of trifle for spectacular presentation.

Chill until ready to serve. Enjoy!

COOK'S NOTE

Shortcut suggestions: Substitute a jar of caramel sauce and container of whipped topping to create a shortcut version of this fabulous treat.

Serves 4.

Salmon Chowder or Fish Chowder, either way it's soo good!

I have to post my version of this recipe from Simply Recipes by Elise Bauer. Here is a link to the original Fish Chowder recipe.

Love this recipe. It just works. I do some substitutions or just plum leave things out, but maybe one day, I will follow it to the letter. (Basically I leave out the white wine and the clam juice. I don't normally have them on hand. Sometimes I'll add a dash of vinegar to mimic the white wine, but don't be heavy-handed about it! And I might substitute just a tiny bit of Worcestershire sauce and pretend it's clam juice. It does have anchovy juice in it.)


Sometimes I can't help myself and add a little dried dill. My husband also isn't a big fan of dill, so I don't get it often and it just seems to go so hand-in-hand with fish dishes anyway. I will also cheat with the potatoes and sometimes get them softening in the microwave, to save on cooking time. I'm such a little cheater! But I like saving time!

I will use either frozen halibut or canned Alaskan salmon (the cheap, yummy, bone-filled, lower-mercury kind) in the recipe. Again, it depends on what I have on hand. I don't bother deboning the salmon bones, they are pretty edible anyway and they are good for you. If I'm going to serve some to others or drop the soup off for a friend, I'll remove more bones just to make it more appetizing for them.

And I usually won't have so much cream on hand, sometimes none, so I'll just make it with whole milk or figure something out. Milk will scorch faster than cream, so watch out! I know, I'm probably too loosy-goosy here, but I've had really great results. I've made it a few times a few ways and I've always loved it. Since I'm the only big fish eater here in the house, I'll either cut the recipe amounts in half or just store it in the fridge and have it a few days for lunch. Mm. Enjoy that chowder, and don't let fish haters in your house stop you from enjoying yourself!

----------------------

Salmon Chowder Recipe
Prep time: 15 minutes
Cook time: 40 minutes

INGREDIENTS
1 Tbsp olive oil
1 teaspoon butter
2 medium yellow onions, chopped (about 2 cups)
1/2 cup dry white wine (optional)
3 large Yukon Gold potatoes (about 1 1/4 pounds), peeled, cut into 3/4-inch cubes
2 cups clam juice (optional)
1 bay leaf
1 Tbsp fresh thyme, or 1 teaspoon dried thyme
1 1/2 teaspoon salt
1/4 teaspoon freshly ground black pepper
1 teaspoon Old Bay (optional, can use a little paprika and a dash of cayenne)
1 1/2 to 2 lbs wild pink Alaskan canned salmon (or fresh salmon or cod, etc.)
1 1/2 cups heavy cream or milk (but watch out for scorching if you don't use cream)
2 Tbsp chopped fresh (or dried) parsley

METHOD
1 Heat oil and butter in the bottom of a large pot (6-qt) on medium heat. Add the onions and cook until softened, about 5 minutes. Add the wine, if using, and turn up the heat, cook, uncovered until the wine reduces by half. (If not using wine, add 1/4 cup of water with the clam juice.)

2 Add the potatoes, clam juice, bay leaf, thyme, salt and pepper, and Old Bay spice. (The potatoes should be just barely covered with the liquid in the pot. If not, add water so that they are.) Bring to a simmer, then lower the heat to medium and cook, covered, until the potatoes are almost done, about 10-15 minutes. (Sometimes I will cheat and use baked potatoes cut in cubes. You can cook them in the microwave and add them toward the end.)

3 In a separate pot, heat the cream until steamy (not boiling).

4 Add the fish to the pot of potatoes and add the heated cream. Return to the stove. Cook on low heat, uncovered, until the fish is just cooked through, about 10 minutes. Keep your eye on the heat! If you are using straight heavy cream you should be more easily able to avoid curdling, even if the soup starts to boil. But if you are substituting light cream, half and half, or milk, the mixture will likely curdle if it gets near boiling point (one of the reasons I like using straight heavy cream). Keep the temperature so that it barely gets steamy, but not simmering. If using fresh fish, when the fish is just cooked through, remove from heat.

Mix in the parsley. The flavors will improve if the soup rests 30 minutes before serving.

Serve with crusty bread or oyster crackers (not for gluten-free version).

Yield: Serves 6.

Thursday, February 21, 2013

I Must Not Forget This Dinner - Swiss Alps Chalet Style

Best.
Dinner.
Ever.

Okay, best dinner in awhile. Except we had the lime pork tenderloin again the other day and that was still pretty good.

Here's what's up. It just snowed today in Albuquerque, gave us a nice dusting in the city and the nearby Sandia mountains look nice and covered. It's been cold, it's been windy, we got big, fat flakes for a little while and Adeline wanted to go run around the neighborhood with me in the flakes. It was fun! After some 50 and 60 degree F temps, it was starting to feel like winter again with the 30 to 40 F (it's still February, after all!) and we went with it.


Somebody pinned a yummy looking asparagus dish on Pinterest. It looked good but I didn't pin it. Going back, Pinterest has a pretty bad search engine so it was hard to find what I was looking for, and I don't remember who pinned it. I found some other even better looking asparagus dishes. Then I just had to get asparagus, puffed pastry, smoky Gouda (was supposed to be Gruyere, oops!), and prosciutto (for another day).


::Swiss Alps Ski Chalet Dinner breakdown::

Salad
-Fresh Express Sweet $ Crunchy (on sale at Albertsons) with green and red butter lettuce
-Topped with diced bits of Golden Delicious apples and a little bit of grated smoked Gouda
-Lightly drizzled with Braswell's (cheap at Ross, if they still have it) Vidalia Onion and Peppercorn

Main Entrees
-Pan-fried chicken breast with salt, pepper, a little Balsamic, and some Herbs de Provence on top, just a hint
-The Tart de Resistance - The Asparagus Tart with Gruyere, er, well, smoky Gouda, because I messed up. It was still super-good! Made me think of a cheese fondue with asparagus!

Side Dish
-Golden Delicious apple slices on a plate (keep the cheesy fondue chalet theme going!)
-Pasta Roni Shells & White Cheddar in case your toddler is fussy and won't eat the tart, and also if your chicken is a little dry because you slightly overcooked it


Heavenly! I took pictures of the tart, but the girl who originally posted the recipe has better picture. I had one minute to snap mine before the hungry masses wrestled the camera away from me so we could fill our hungry bellies. I try to have dinner ready at 6 p.m., but tonight it was more like 6:30 p.m. And the tart technically only takes a little over a half-hour to make and bake!

I went all out, but it was fun. It was another successful cooking adventure! Heeya! Onto the next one.

-Danelle

I'm going to repost the recipe in case her webpage goes down or something.

Asparagus Tart with Gruyere
Shaina Olmanson is the home cook and photographer behind Food for My Family and Olmanson Photography, and a daily contributor to Babble.com’s Family Kitchen Blog.
Inspired by Martha.
Yield: 4-6 servings

Ingredients:
1 sheet puff pastry dough, thawed
1 pound thin asparagus spears
1/3 cup sour cream
2 egg yolks
1 tablespoon Dijon mustard
3/4 cup Gruyère, shredded (I got and used smoky Gouda, but I do know there is a difference. It's hard chasing a toddler around a grocery store. Try it sometime! It's like the shopping Olympics! The 100 meter dash!)

Directions:
Preheat oven to 400 degrees F. Unfold puff pastry dough and Roll into a 14x10" rectangle on a lightly floured surface. Move the puff pastry to a parchment-lined baking sheet. Score the dough 1" from the edge all around the rectangle with a knife. Dock the inside rectangle by poking it lightly with a fork in approximately 1/2" spaces. Bake for 15 minutes.
While the pastry is baking, prepare your asparagus spears by rinsing and removing the woody ends. Set aside. In a small bowl, mix together sour cream, egg yolks and Dijon mustard. Stir in 1/4 cup of the Gruyère.
Remove the puff pastry from the oven and spread the sour cream mixture evenly over the inside rectangle. Top with the remaining Gruyère cheese and layer with the asparagus spears. Return to the oven and bake for 15 additional minutes until cheese begins to brown lightly and asparagus is cooked.
Remove from oven and allow to cool slightly. Slice using a pizza cutter and serve.

Sunday, October 7, 2012

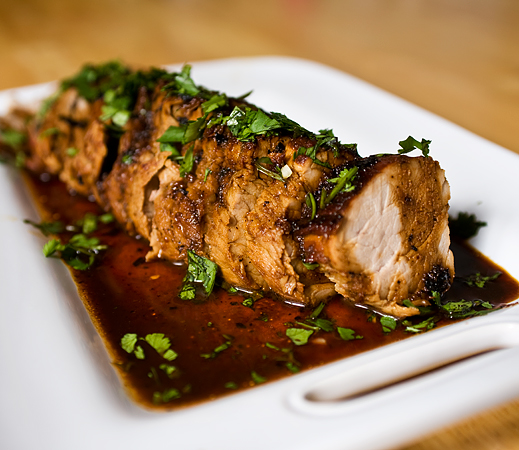
Pork Tenderloin double whammy adventure. Honey Lime Chipotle Pork Tenderloin

I love promptings. I bought a pork tenderloin but I didn't realize that two were in the package. I found the Pork Wellington recipe and thought that was going to be the end of it, but I also found another great pork tenderloin recipe that was the runner-up. When I was out ingredient shopping for the Wellington, I just figured that maybe I should get the ingredients for the Honey Lime Chipotle recipe too, even though I would have to go and buy another pork tenderloin, or so I thought!

Imagine my surprise and pleasure when I opened the package and was surprised by TWO pork tenderloins. Well, if I was smart and had read the instructions, then I would have realized that there were two inside. But it was still a happy surprise, and it made our dinners even cheaper in the long run! We are trying to save money. Save money that we don't even have. Long sob story. But hopefully the silver lining will be visiting us soon when this year is up.

Onto the recipe! The marinade is AMAZING! Like, dip-your-finger-in-there-multiple-times-to-get-a-taste kind of goodness! I found myself drizzling it on chips after dinner and it made them taste like those FABULOUS Hint of Lime Tostitos that I could pig out on. I am wanting to make it right now! I put it on salad, I could put it on anything! Yogurt, ice cream, sure! Why not? Oh, I should clarify. It's the sauce that is saved for the drizzling later, the sauce that DOESN'T have the chipotle pepper/adobo sauce in it, not the one that the meat actually sits and marinades in.

Here's the recipe. It's been slightly tweaked from the Alton Brown Food Network one, slightly improved, I would say. The recipe is doubled and there are some slight changes, like the browning of the meat. I will include the link and also the recipe in its entirety. Please enjoy!

You can enjoy it with your eyes first, and then with your MOUTH! (Ya know, when you get around to making it for yourself and/or your family.)


Honey Lime Chipotle Pork Tenderloin
By Alton Brown, tweaked by Chaos in the Kitchen.
http://chaosinthekitchen.com/2009/08/grilled-pork-tenderloin-honey-lime-chipotle-marinade/

serves 6, prep 15 min, marinate overnight or as long as possible, cook 20 min
• 2 lbs pork tenderloin (2 small tenderloins)
• 1 cup lime juice, about 8 juicy limes
• zest from 2 limes
• 1/2 cup honey
• 1 tbsp kosher salt
• 1 tsp garlic powder
• 2 chipotle chiles in adobo sauce, chopped
• 1 tbsp adobo sauce (from canned chilies)
• peanut oil, or other high temperature oil
• cilantro

1. Trim tenderloins of fat and silver skin as much as possible. Place in a large ziplock bag or other container to marinate.
2. In a bowl combine lime juice, zest, honey, salt, and garlic powder.
3. Stir to combine, then pour half over tenderloins, reserving half for sauce.
4. To tenderloins add chiles and adobo sauce. Seal and marinade in fridge.
5. About 30 minutes before you are ready to cook, remove pork from fridge and allow to come to room temperature.
6. Preheat oven to 425°F. In a large, heavy oven-proof skillet (like a cast iron skillet), heat enough oil to coat over medium high temperature.
7. Remove tenderloins from marinade and sear in hot skillet on all sides.
8. Place the skillet in the oven and roast tenderloins for about 15 min.
9. Check temperature with an instant read thermometer. Remove pork from the oven at approximately 140-145, cover pork in skillet with foil. Let rest on the counter for 5-10 minutes or until temperature rises to 150.
10. Remove pork to a cutting board, pour reserved lime juice mixture into skillet with meat juices and heat on high.
11. Allow sauce to reduce and thicken slightly, then pour over sliced pork tenderloins. If you don’t have enough sauce or it thickens too much you can add a little water and continue simmering it until it is the quantity and thickness you want.
12. Garnish with freshly chopped cilantro.
If you choose to grill, start at step 5 and grill your tenderloins about 15 minutes. Remove from the grill to a platter at 140°F. Pour reserved lime juice mixture over meat and cover with foil. Allow to rest 10 minutes. Then slice, garnish with cilantro and serve.
Pork tenderloin is very lean and requires a gentle hand to keep it from drying out. If you choose to use a pork loin it will require longer cooking time and not be as tender.

Pork Tenderloin - Double whammy tenderloin weekend

About two weeks ago, I was checking the expiring meat at Wal-mart and saw a nicely priced pork tenderloin. I had never made a pork tenderloin but probably a year ago, Adam and I watched a great Alton Brown show where he went through the method of cooking a pork tenderloin. I bought it, froze it, and talked to Adam about cooking it. He recommended that I use the Alton Brown recipe.

I finally got around to thawing and cooking the tenderloin and it was FABULOUS! In this installation, I used the Pork Wellington recipe by Alton Brown. It is such a great recipe! I look forward to using it again. Come on Wal-mart, keep those cheap expiring meats coming!

Don't forget to add puff pastry, prosciutto, and fresh thyme to your shopping list. And pork tenderloin if you don't already have one. Oh yes, and some dried apple (but I forgot and in a pinch ended up using fresh diced apples, and dried thyme). Target had the first two ingredients, but no fresh thyme. And if your tenderloin comes in packs of two, like ours did, then you can make my next posted recipe, Honey Lime Chili Grilled Pork Tenderloin, also by Alton Brown. It was also exquisite!

Mmm, the puff pastry just takes it to another level. It looks like fancy catered wedding food.


Pork Wellington recipe from Food Network
By Alton Brown
http://www.foodnetwork.com/recipes/alton-brown/pork-wellington-recipe/index.html

Recipe listed here as well, in case the unthinkable happens and Food Network shuts down or something.

Prep Time:30 min
Inactive Prep Time:10 min
Cook Time:30 min
Level: Easy
Serves: 4 servings

Ingredients
1 whole egg
1 tablespoon water
1-ounce dried apple rings
1 whole pork tenderloin, approximately 1 pound
4 1/2 ounces thinly slice prosciutto ham
1/4 teaspoon kosher salt
1/4 teaspoon freshly ground black pepper
1 teaspoon chopped fresh thyme leaves
1 teaspoon all-purpose flour
1 sheet puff pastry, thawed completely
1 tablespoon whole-grain mustard

Directions
Place a rack in the upper third of the oven and heat to 400 degrees F.

Whisk the egg and water in a small bowl and set aside. Place the apple rings into the bowl of a mini food processor and process for 30 to 45 seconds or until they are the size of a medium dice. Set aside.

Trim the pork tenderloin of any excess fat and silver skin. Slice the tenderloin down the middle lengthwise, creating 2 separate pieces. Lay the tenderloin pieces next to each other head to tail, so when laid back together they are the same size at the ends.

Lay out a 12 by 16-inch piece of parchment paper on the counter and arrange the pieces of prosciutto in the center, overlapping them enough to create solid layer that is as long as the tenderloin. Top with a second piece of parchment, and using a rolling pin, roll over the prosciutto to help adhere the pieces to each other. Remove the parchment paper and sprinkle the prosciutto with the salt, pepper, and thyme. Set the tenderloin down the middle of the prosciutto. Spread the dried apples in between the 2 pieces of tenderloin and push back together so the apples are held between them. Using the parchment paper to assist, wrap the prosciutto around the tenderloin to completely enclose in a package.

Sprinkle the counter with flour and roll out the pastry to 12 by 14 inches. Spread the mustard thinly in the center of pastry and lay the prosciutto wrapped tenderloin in the center of the pastry on the mustard. Fold the puff pastry up and over the top of the tenderloin, then roll to completely enclose, brushing the edges of the pastry with the egg wash in order to seal. Turn the tenderloin over so the side of the tenderloin with the double thickness of pastry is underneath. Pinch the ends of the pastry to seal.

Brush the entire pastry with the egg wash. Place the tenderloin on a parchment lined half sheet pan and bake for 25 to 30 minutes or until the pork reaches an internal temperature of at least 140 degrees F.

Remove the tenderloin from the oven, transfer to a cooling rack and let rest for 10 minutes before slicing and serving.

Friday, September 14, 2012

Cheesecake Bites in general and plum and apple specifically

This is a new little nugget of joy I discovered. I love these cheesecake bites. They aren't as big as a whole slice of cheesecake, which is too rich anyway, and you can bake some decoratively placed fruit on the top for added visual and gastronomic enjoyment.

Oh boy oh boy oh boy oh boy.


Okay, it's not my photo, but they looked kind of like this, and you could make yours like this. The recipe is pretty general and you can play around with how you add the fruit, and what kind of fruit you'd like to add. Or whatever's in season.

**Personal preference**: I also really hate it when they are in the wrappers. NOTE: No wrappers in above photo. Save everyone some time and sanity (and your money!) and just bake them right into the pan. There is enough butter in the crust that you don't need to grease it. And Pam has yucky stuff in it anyway, the artificial butter flavoring that is in everything these days really isn't good for you and the imitation butter chemicals don't do nice things to your body.)

For some reason, I wanted to make little cheesecake bites about a month or two ago. They turned out GREAT! I had written them on the back of an Adeline drawing from Nursery. (Oops, I should probably be saving some of those for her book of memories or something.) Also, I had written it in crayon! It was the only thing I could find nearby for about ten minutes, so I gave up in exasperation. And plodded on.

Actually, the first time I made these, the crust was... okay. Nothing to write home about. So I didn't write down that part. I looked up another crust and made them for our Relief Society activity a few days ago and it turned out YUMMY! imho.

Here's the recipe. It's got a little issue. The crust recipe I used is for a big 9'' crust, which makes more than 24 cupcake-sized cheesecake bites. And the cheesecake part of the recipe only makes 12. I wanted to make 24 so I doubled the cheesecake part. If you just want to make 12, then you are going to have to halve the crust part of the recipe. Sorry, I'm keeping it confusing. I know I could convert them to both be the same, but the crust recipe is a great recipe if you were making the whole enchilada, er, cheesecake, and not just the bites. And if I made them both for 24, and you only wanted 12, then you'd have to do the math and divide BOTH recipes. I'm just leaving it as is. And sorry for the many tangent.

Cheesecake Bites Recipe


NOTE: If you are going to make this soon, don't forget to get your cream cheese out now to start coming to room temperature, usually takes 30 min. Or you can try to be sneaky like me and microwave it to room temperature. I never plan that far ahead and hate waiting for it to be room-temperature. But this step to soften the cheesecake is super-important and will make for a better cheesecake, no lumps! Do not over-microwave! Cook for 15 sec intervals and check often! Don't forget that the rest of the ingredients should be at room temperature to keep from lumping and curdling, like the eggs (microwave for about 20-25 sec.) and the whipping cream (microwave for just 10 sec or so). That is like THE BIG SECRET of a good cheesecake. It's all about being a stickler pastry chef and making sure things are the right temperature.

Graham Cracker Crust
Yield: 24 cupcake-sized cheesecake bites or 9'' pie crust
Oven Temp: 350 deg F
Cooking Time: 2-3 min. for small cupcake size. (8-10 min for a large cheesecake.)
This needs to cook briefly before adding the cheesecake filling, so I would start this recipe first and make the cheesecake stuff while it's baking.

1 1/2 c. graham cracker crumbs
1/3 c. butter, melted
1/3 c. granulated sugar

Preheat oven to 350 deg F. Mix ingredients together. Spoon about 3 Tbs into each cupcake space (or just until you can't see the bottom of the pan through the crumbs. Lightly press crumbs down so that they form more of a crust. It might still be a little crumbly, and that's fine. Bake at 350 deg F for 2-3 minutes. (Definitely set a timer so you don't get distracted and let them burn.)

Basic Creamcheese Filling
Yield: 12 cupcake-sized cheesecake bites
Oven Temp: 325 deg F
Cooking Time: 12-15 min.
After-cooking "chill" time: (Your cheesecakes need to chill out, man.) 2 hours or overnight.

8 oz. cream cheese, room temperature (I just use Walmart brand, cheap cheap! And still tastes great!)
1/4 c. granulated sugar
2 tsp flour
dash of vanilla
dash of salt
1 egg, beaten, at room temperature
1 Tbs whipping cream, room temperature (Mine had gone bad so I just used milk.)
Fruit - I used some plums I had sliced and frozen and some fresh apple bits. I defrosted the plums and added a little sugar, but just pressed in the tiny apple cubes as is. You can get creative here and use what you have on hand. Sweeten if the fruit is tart and needs some sweetening.

Preheat oven to 325 deg F. Stir the cream cheese and the sugar in a medium-sized bowl for 12, and a large-sized bowl for 24. Stir until nice and soft and creamy and it just looks great. If lumpy, keep going. But sometimes the lumpiness can bake out, so again, don't think you have a huge disaster on your hands, keep cooking and hope for the best. Keep Calm and Cook On! (The first batch I made was as lumpy as all-get-out, and it still ended up looking/tasting pretty good. But the second batch was definitely better because I stopped being a lazy chef and started being a stickler.) This is probably the most important step. It's getting your cream cheese to behave.

Add the flour, vanilla, salt, egg, and whipping cream and mix until uniform. Spoon into prepared cupcake pan over the semi-baked crust, filling to about 2/3 full. Press the fruit into the cheesecake, being as creative in presentation as you like. (I like a fanning effect with the plum slices.) Bake at 325 deg F for 12-15 min. or until done. It's nice when it's getting the slightest golden color on the edges. Remove from oven, let cool for about 15 min, and remove from pan with a teaspoon, carefully sliding it around the edges and gently schooping. Haha, I typed it as schooping. I'm totally leaving that in here.

Then I let them cool completely on a plate. Because hey! You're probably going to be throwing saran-wrap over that plate and taking it to some party/function, and hey, less dishes to do! Cut out the middle man! I found that not all of them fit on the plate, so I put another layer of plastic wrap over the tops of the first layer and added another layer, and then finished it up with more plastic wrap so it wouldn't get stale.

Enjoy those cheesecake bites!

Monday, September 3, 2012

Apple Puffed Pancake - Breakfast for Dinner

Apple Puffed Pancake - A Brown Family Favorite!

Cinnamon and apples make it extra delicious.
For best results, I usually do 1 and ½ times the amount and increase cooking time. A spiral apple corer/peeler works great for this recipe.


Yum! One of my favorite things ever and reminds me of growing up.


Prep: 15 min.
Start To Finish: 40 min.
Yields: 6 servings (meh, more like 4. You will want a few slices!)

6 eggs (9 eggs)
1 1/2 c. milk (2 c. milk)
1 t. vanilla (1 ½ t. vanilla)
1 c. all purpose flour (1 ½ c. all purpose flour)
3 T. sugar (5 T. sugar)
1/2 t. salt (3/4 t. salt)
1/4 t. ground cinnamon (1/2 t. cinnamon)
1 stick (1/4 lb) of butter (1 stick of butter plus ¼ c. olive oil)
2 apples - peeled, cored & sliced (3 or even 4 apples – I love it apple-heavy)
3 T. brown sugar (5 T. brown sugar or nicely evenly sprinkled on top)

1. Preheat oven to 425 deg F.
2. In a large bowl, mix eggs, milk, flour, granulated sugar, vanilla. Salt, and cinnamon until blended. Batter will remain slightly lumpy.
3. Melt butter in a 13x9 in. baking dish in the oven. Add apple slices to baking dish. Return to oven until butter sizzles. Do not let the butter brown.
4. Remove dish from oven and pour the batter over apples. Sprinkle brown sugar over the top.
4. Bake for 20 min. in the middle of oven, or until puffed and lightly browned. Makes 6-8 servings.

Time to bust out the spiral apple slicer! This will save time.

Thursday, August 30, 2012

Real Thai Chicken Satay with Peanut Sauce

Real Thai Chicken Satay with Peanut Sauce
Edited and changed
Originally from http://thaifood.about.com/od/thairecipes/r/thaichickensate.htm


I can attest that this is quite mouth-watering and savory.

And don't worry, you don't need a grill to make my version. Just an oven.

Prep Time: 30 minutes
Cook Time: 30 minutes
Total Time: 60 minutes
Yield: SERVES 4 as a Main Entree
Bake at 350 F.
Don't forget to start your rice now. I cook mine in a rice cooker. I do about 3 cups, we like to have leftovers for packed lunch for Adam.

Ingredients:
4-6 chicken breasts, thawed

SATAY MARINADE:
1/4 cup minced lemongrass , fresh or frozen (can substitute lemon juice/lemon zest/or leave out completely)
2 shallots OR 1 small onion, sliced
3 cloves garlic
1-2 fresh red chilies, sliced, OR 1/2 tsp. to 1 tsp. cayenne pepper, to taste (only did a sprinkle, kept it mild for my child.)
1 thumb-size piece galangal OR ginger, thinly sliced
1 tsp. minced fresh turmeric OR 1/2 tsp. dried turmeric
2 Tbsp. ground coriander
2 tsp. cumin
3 Tbsp. dark soy sauce (available at Asian food stores) (just used regular soy sauce)
4 Tbsp. fish sauce (substituted soy sauce)
5-6 Tbsp. brown sugar
2 Tbsp. vegetable oil
Dipping Sauce: see Easy Satay Peanut Sauce below

Preparation:

If using wooden skewers, soak them in water while you prepare the meat (to prevent burning). The kitchen sink works well for this.Cut chicken into thin strips and place in a bowl. Place all marinade ingredients in a food processor or chopper. Process well.

(just mixed the marinade together in bowl, I didn't bother with the food processor.)

Taste-test the marinade - you will taste sweet, spicy, and salty. The strongest tastes should be SWEET and SALTY in order for the finished satay to taste its best. Add more sugar or more fish sauce (in place of salt) to adjust the taste. You can also add more chili if you want it spicier. Pour the marinade over the meat and stir well to combine. Allow at least 1 hour for marinating, or longer (up to 24 hours).

(didn't wait, cooked chicken as whole breasts immediately in marinade in glass dish in oven, baked at 350 F for about 25 min., the juices from the cooked chicken marinade are great drizzled over rice, tasted fine without the skewering and long marinading.)

When ready to cook, thread meat onto the skewers. Tip: Fill up to 3/4 of the skewer, leaving the lower half empty so that the person grilling has a "handle" to easily turn the satay during cooking. Grill the satay on your BBQ, OR on an indoor grill, basting the first time you time it with a little of the leftover marinade from the bottom of the bowl. OR you can broil in the oven on a broiling pan or baking sheet with the oven set to "broil" Place satay close beneath the heating element and turn the meat every 5 minutes until cooked (be sure to soak your wooden satay sticks in water before skewering). Depending on how thin your meat is, the satay should cook in 10 to 20 minutes. Serve with rice and my Easy Satay Peanut Sauce for dipping. ENJOY!

(We put the chicken breasts over a bed of rice, poured some of the chicken juices over the chicken and rice, and cut the chicken in bites to dip into the peanut sauce. Mmm! Fast and easy.)

Easy Satay Peanut Sauce -

Prep Time: 15 minutes
Total Time: 15 minutes
Yield: SERVES 4-6 as a Dip

Ingredients:
1 cup fresh-tasting dry roasted peanuts, unsalted
1/3 cup water
2 cloves garlic, minced
1/2 tsp. dark soy sauce
2 tsp. sesame oil
2 Tbsp. brown sugar
2 to 2.5 Tbsp. fish sauce - for vegetarians: substitute 2.5 to 3 Tbsp. regular soy sauce
1/2 tsp. tamarind paste OR 1/2 Tbsp. lime juice
1/2 tsp. cayenne pepper, OR 1 tsp. Thai chili sauce (more or less to taste)
1/3 cup coconut milk

Preparation:
Place all ingredients in a blender or food processor. Blend or process until sauce is smooth. If you prefer a runnier peanut sauce, add a little more water or coconut milk. Do a taste test, adding more fish sauce (or soy sauce) if not salty enough, or more cayenne if not spicy enough. If too salty, add a squeeze of fresh lime juice. If you'd prefer it sweeter, add a little more sugar. Serve warm or at room temperature with my Thai Chicken Satay, Thai Pork Satay, or Vegetarian/Vegan Thai Satay. It also makes a great dip with fresh veggies, fresh rolls, or other Asian finger foods. Or combine with noodles to create a Thai-style noodle dish or cold noodle salad. Enjoy!

Note: This sauce tends to thicken as it sits - just add a little water or coconut milk to thin it out, as needed. Otherwise it stores well if kept covered in the refrigerator (keep up to 2 weeks; freeze thereafter).

Layered Angel Fruit Cream Cake for a hot summer's day

Shall I compare thee to a summer's day?
Thou art more lovely and more temperate:

Doesn't this hot summer weather stink? I am roasting, I tell you, ROASTING! I wish it were more temperate. Here is a great dessert to help you beat the heat. It is a great show piece so it's perfect for a family gathering or party, and technically it is a no-bake cake too, so it's relatively easy. You could get your two-year-old to help you! The assembly is a little time consuming, and there is freezer time involved as well. But you will be well rewarded, and you might get audible "Oohs and Aahs" from the people about to enjoy the cake. It does't just look good; it tastes amazing. My nephew licked his plate clean. Apart from the bad manners, it was quite the compliment and made me laugh. You will also need a large chiffon/angel food metal cake pan and enough space in the freezer for this to set up for two days.

I got this recipe out of a magazine called Home Living, Aug 2011 issue. I went with Adam to Jefferson City, MO, for his swearing in as an attorney after passing the Missouri Bar. Good work, Adam! I think it's a local Missouri magazine. Oh, now I'm seeing more info about the recipe on the page I tore from the magazine. I picked up the magazine while we were getting lunch at a delightful little cafe not far from the state capitol building. The recipe is by Denise McMillen and she can be contacted at denise@newstribune.com. If you like her recipe enough, you could send her a Thank You e-mail to let her know you appreciate her. :-)

In case all my words have not persuaded you, maybe this picture of the cake will. (Please forgive the fact that it came out of a torn and folded magazine page.)


This cake is as lovely as a Shakespeare sonnet. So without further ado (much ado?), the recipe, maestro.

Layered Angel Fruit Cream Cake

Serves 8-10 people.
Time needed: 30 min. assembly, and 2 days to set up in the freezer.

Ingredients:
1 angel food cake
1 3oz. pkg strawberry gelatin, dry
1 3oz. pkg lime gelatin, dry
1 3oz. pkg orange gelatin, dry
20 oz. frozen strawberries, thawed and drained of juice, but save the juice
1/2 gal. vanilla ice cream
1/2 gal. orange, lime, and lemon sherbet blend
1 large can pineapple tidbits, drained
1 large can mandarin oranges, drained

1. Divide the angel food cake into three layered sections. Slice each layer into small cubes and place in three separate bags or bowls. Sprinkle the dry strawberry gelatin onto one layer of cubed angel food cake until all four sides are colored as heavily as possible. Repeat with the lime gelatin and again with the orange gelatin. You will have a few tablespoons of the dry gelatin powder remaining in your bag or bowl and can discard.
2. Depending on the size of your tube pan, you may/will have leftover ice cream and/or sherbet. Take the cake cubes flavored with the strawberry gelatin and place them in the bottom of a large tube pan. Add the drained strawberries on top of the cake, distribute evenly and drizzle some of the juice over the cake. Add enough softened vanilla ice cream to cover the strawberries completely.
3. Add the lime gelatin angel food cake cubes, then sprinkle pineapple over the cake and cover with a layer of sherbet. Layer the orange gelatin angel food cake and cover with mandarin oranges. Cover up with another layer of vanilla ice cream.
4. Freeze for two days, take out and let thaw for about ten or fifteen minutes, invert onto platter, and slice when ready to serve. Enjoy.

Moroccan Chicken Tagine

I made my first Moroccan Chicken Tagine. It was quite serendipitous. Adam had set up the free Amazon Prime streaming videos to our Blu-Ray. (Thanks for the Christmas present, Mom and Dad Rowley!) I was looking for something to watch. Then I saw America's Test Kitchen. I had never seen an episode before. My sister-in-law Sarah had been telling me about how great it was (a year or so ago). So I gave it a chance. I was looking through the episodes, and the Moroccan one sounded great! I'd love to travel there someday. One of my friends went there recently and he took the BEST photos of all the amazing mosques and architecture and his whole amazing experience. Since I can't go there right now, I could still get a "flavor" of the country by experiencing some of the food. I watched the episode, and then the next day, my delusions of grandeur took over and I tried to cook the dish. I only had the episode (duh, I should have pulled up the recipe on the internet), and it took FOREVER because I had to fast-forward and rewind and make sure I hadn't missed a step or an ingredient. That was definitely NOT the best way to cook the recipe. Adam had come home and I still wasn't done, and I think I was teaching a voice lesson after dinner so I was really stressing and I had to have him dive in and help me with watching the episode and getting everything all cooked and finalized. It came off as a success (thanks Adam for the help!) and was SO DELICIOUS! I highly recommend it.

If you will watch the episode (it's long and they take a lot of tangents talking about the best way to cook couscous, etc.) then you can see it here. You might have to give you e-mail address. That part is a little annoying.

Moroccan Chicken Tagine

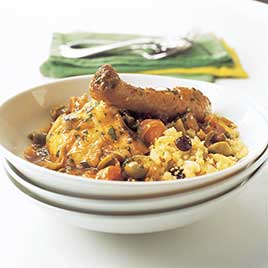
This is what you could be eating!


Other things I did differently:
I only had chicken breasts on hand, so that's what I used. I didn't bother with all that breaking down of the chicken, although in the show they give very good instructions on how to do it. Looks like fun and I want to try it sometime. I also didn't add the olives, we're really not that big of fans. I did make the lemon salt garlic paste by scraping it with the flat part of the knife. That part was really interesting and fun. I didn't have a dutch-oven pot, so I just used a big soup pot. Maybe that goes without saying. I don't think I had the fresh cilantro either. It still tasted good without it, but I do love my fresh cilantro!

I also made the couscous pilaf to go along with the chicken, and it is NOT included in the recipe below. It can only be accessed through the part of the website that you have to pay for (boo!) so I was going to watch the show again and transcribe that part and include it. Only I haven't done that yet. Sorry. Also, I didn't have couscous on hand so I used rice and toasted in the pan before cooking. It turned out very well! Good luck and I hope you enjoy! The recipe is a little involved, but I love how unusual it is and I love to challenge myself every now and again. I can go back to easy lazy cooking tomorrow and the rest of the week!

UPDATE: The couscous recipe is added now and can be found at the bottom of the post. Thanks!

Moroccan Chicken with Olives and Lemon (Chicken Tagine)

Serves 4
Bone-in chicken parts can be substituted for the whole chicken. For best results, use four chicken thighs and two chicken breasts, each breast split in half; the dark meat contributes valuable flavor to the broth and should not be omitted. Use a vegetable peeler to remove wide strips of zest from the lemon before juicing it. Make sure to trim any white pith from the zest, as it can impart bitter flavor. If the olives are particularly salty, give them a rinse. Serve with couscous (see related recipe).

INGREDIENTS
1 1/4teaspoons sweet paprika
1/2teaspoon ground cumin
1/4teaspoon cayenne pepper
1/2teaspoon ground ginger
1/4teaspoon ground coriander
1/4teaspoon ground cinnamon
3strips lemon zest (each about 2 inches by 3/4 inch)
3tablespoons fresh lemon juice, from 1 to 2 lemons
5medium cloves garlic, minced or pressed through garlic press (about 5 teaspoons)
1 whole chicken (3 1/2 to 4 pounds), cut into 8 pieces (4 breast pieces, 2 thighs, 2 drumsticks; wings reserved for another use) and trimmed of excess fat
Salt and ground black pepper
1tablespoon olive oil
1 large onion, halved and cut into 1/4-inch slices (about 3 cups)
1 3/4cups low-sodium chicken broth
1tablespoon honey
2 medium carrots, peeled and cut crosswise into 1/2-inch-thick coins, very large pieces cut into half-moons (about 2 cups)
1cup Greek cracked green olives, pitted and halved
2tablespoons chopped fresh cilantro leaves

INSTRUCTIONS
1. Combine spices in small bowl and set aside. Mince 1 strip lemon zest; combine with 1 teaspoon minced garlic and mince together until reduced to fine paste; set aside.

2. Season both sides of chicken pieces liberally with salt and pepper. Heat oil in large heavy--bottomed Dutch oven over medium-high heat until beginning to smoke. Brown chicken pieces skin side down in single layer until deep golden, about 5 minutes; using tongs, turn chicken pieces and brown on second side, about 4 minutes more. Transfer chicken to large plate; when cool enough to handle, peel off skin and discard. Pour off and discard all but 1 tablespoon fat from pot.

3. Add onion and 2 remaining lemon zest strips to pot and cook, stirring occasionally, until onions have browned at edges but still retain shape, 5 to 7 minutes (add 1 tablespoon water if pan gets too dark). Add remaining 4 teaspoons garlic and cook, stirring, until fragrant, about 30 seconds. Add spices and cook, stirring constantly, until darkened and very fragrant, 45 seconds to 1 minute. Stir in broth and honey, scraping bottom of pot with wooden spoon to loosen browned bits. Add thighs and drumsticks, reduce heat to medium, and simmer for 5 minutes.

4. Add carrots and breast pieces (with any accumulated juices) to pot, arranging breast pieces in single layer on top of carrots. Cover, reduce heat to medium-low, and simmer until instant-read thermometer inserted into thickest part of breast registers 160 degrees, 10 to 15 minutes.

5. Transfer chicken to plate or bowl and tent with foil. Add olives to pot; increase heat to medium-high and simmer until liquid has thickened slightly and carrots are tender, 4 to 6 minutes. Return chicken to pot and add garlic-zest mixture, cilantro, and lemon juice; stir to combine and adjust seasoning with salt and pepper. Serve immediately.

TO MAKE AHEAD: The recipe can be prepared through step 4, cooled, and refrigerated for up to 2 days. To serve, gently warm until the chicken is heated through, then proceed with the recipe from step 5.


Authentic Moroccan Couscous

Ingredients:
3 Tbs unsalted butter
3 shallots, sliced thinly (or 1 onion, seriously, who buys shallots?)
2 cups couscous
1 clove of garlic, minced
1 cup water
1 cup chicken broth
1 tsp salt
1/2 tsp grated lemon zest
2 tsp lemon juice
1/4 cup fresh parsley, chopped
3/4 cup toasted almonds, chopped


Add the butter to a sauce pan at medium-high heat until it melts. Add the shallots and cook in butter for 5 minutes until toasted and caramelized. Add the garlic, cook for 30 seconds or until fragrant.

Add couscous, toast to golden for about 5 minutes, but keep your eye on it! It can go from toasted to burned quickly. Then add the water and chicken broth, stir, let sit for 1 minute. Add the salt, stir, and put on the lid and remove couscous from heat. The couscous will continue to cook and absorb the liquid. Let it rest for about 7 minutes. When liquid is absorbed by the couscous, add lemon zest, lemon juice, parsley, and toasted almonds and stir in together in the couscous. Enjoy!

Wednesday, December 14, 2011

Followers

LOL! I saw that I had followers and I did not want to disappoint! So I posted! I hope to be posting more and more. Because I had followers before I had even posted one recipe! Thanks for having faith in me, followers!
-Danelle

Tuesday, December 13, 2011

Tonight I Made My First White Bean Chili Recipe

Hello everyone,

Must be brief, tonight I made a White Bean Chili Recipe. I had never made one before. I remember going to a work party at Missouri American Water. (I had the best extended temp job there, wow, it feels good to remember it! It lasted something like 5 months! Loved my boss and my coworkers!) Some people made gumbo, there was a gooey butter cake (this is St Louis, people, gotta have your butter cake), and a bunch of different chilis. That was where I had my first White Bean Chili. I did enjoy it. I like regular chili too, and if given the choice I might choose regular chili over white chili, but that's probably because I'm more used to it.

Regardless, tonight I had a hankering for White Bean Chili. Normally, I scour the internet or The Better Homes And Gardens Recipe Book for recipes and ideas. I usually will give preference to the Food Network recipes that I find online, and the highest rated (Adam taught me these wonderful tricks), and especially Bobby Flay recipes. My husband and I are big fans.

However, in the Google search below the link to the Food Network White Chili recipe, there was a Pioneer Woman recipe that caught my eye. Wow, 2008 was a great year. It was the year I started working at Missouri American Water, and also it was the year that my friend Amy first told me about the Pioneer Woman and her fabulous recipe blog. Thanks Amy, for introducing us!

Well I'm ashamed to say that while I've read her blog since 2008, this was the FIRST TIME I've ever cooked anything from her blog. She comes highly recommended, but I was a little bit skeptical, because, hey! The Food Network is pretty darn good too!

This recipe, imho, delivered. It was just what I wanted from a White Bean Chili Recipe. I want you to have a good experience too. Here's the link to her post. Now enjoy that chili on a cold winter's evening!

The Pioneer Woman - Simple Hearty White Chili

Here's a picture of what you could be enjoying soon.


My only regret is that I didn't have any cilantro on hand. Frowny. :-(

Fyi, I just realized that in her looong version of the instructions, near the beginning steps she cooks the onions and garlic in butter and olive oil, but has left this off of the shorter, printable version of the recipe. I made mine without the butter and the oil so it was probably healthier, but maybe it could have tasted better. Please be aware of this step and make your own call. Also, the recipe called for a lot of chicken broth. Since I made my chili from canned beans which had already been soaking in moisture, I didn't need quite that much broth, so I probably should have scaled that back too. Oh well, it fed 8 people and it was still YUMMY! :-)

Mwah! You get a kiss tonight! Lucky you! (That will teach me to blog after midnight!)

Sincerely,
Danelle

P.S. That reminds me, I need to put that chili away so I can eat it tomorrow!

Thursday, July 14, 2011

Sharing Recipes

Sharing recipes is fun! I hope to do it more. Hence this blog. Please enjoy the things I post and I hope you have your own great adventures in cooking. I hope to post pics and instructions and how I've made recipes easier or more delicious.

Sincerely,
Danelle